 If you follow The Steady Table on Instagram you’ll know that our bread game is strong right now. We’ve jumped on the COVID-baking bandwagon and jumped on it hard.
When we started isolating back in mid-March we quickly plowed through our 5lb bag of flour. We then depleted a 25lb bag and are now well into a 50lb bag.
The 50 pounder just gets moved around the kitchen floor because it’s so big we have nowhere to store it. I’m thinking of giving it a name.
Here are four breads that have been really doing it for us lately. From the very-quick Irish Soda Bread, to the pretty-quick No-knead Peasant and Parker House Rolls to the totally-worth-the-21-hour-wait Classic No-knead bread.
• Irish Soda Bread •
from the Avoca Cafe Cookbook
Start to finish, less than 1 hour
Image bottom left. This is a simple, dense but not too dense white bread great with butter and jam or with a soup or stew. It’s best if you have a weighing scale for this recipe but I’ve put equivalents just in case.
Ingredients
1 lb flour (about 3 2/3 cups)
1 teaspoon baking soda
1 teaspoon sugar
1/2 teaspoon salt
400 ml / 14 oz buttermilk or milk mixed with a teaspoon of lemon juice or white vinegar
Heat oven to 450 degrees. Grease a 9 x 5 ” loaf pan with butter. Mix all the dry ingredients together in a large bowl. Gradually mix in the buttermilk to make a moist dough. Place dough in greased pan and bake for 30 minutes or when the loaf sound hollow when removed from the pan and tapped on the bottom. Cool on a wire rack.
_____
• No-Knead Peasant Bread •
from Food52 (Alexandra Stafford)
Start to finish, about 2 hours
Image top left. This is a flavorful yeasty bread, with enough saltiness to eat on it’s own (not that we’d ever forsake butter).
Ingredients
4 cups (512 grams) unbleached all-purpose flour
2 teaspoons kosher salt
2 teaspoons sugar
2 1/4 teaspoons instant yeast (I used active dry and it was fine)
2 cups lukewarm water, made by mixing 1/2 cup boiling water with 1 1/2 cups cold water
Softened unsalted butter, for greasing
In a large bowl, whisk together the flour, salt, sugar, and instant yeast. Add the water. Using a rubber spatula, mix until the water is absorbed and the ingredients form a sticky dough ball. The recipe says that if you are using active dry yeast instead, proof it in the lukewarm water first for about 10 minutes, until foamy, before adding to the other ingredients – I did not do this and my bread came out brilliantly.
Cover the bowl with a damp tea towel or plastic wrap and set aside in a warm spot to rise for 1 to 1 1/2 hours, until the dough has doubled in bulk. Note: Here’s a trick for making the perfect warm spot for the dough to rise. Set the oven to 400° F and let it preheat for 1 minute, then shut it off. The temperature will be between 80° F and 100° F. you should be able to place your hands (carefully) on the oven grates without burning them.
Set a rack in the middle of the oven and preheat it to 425° F. Grease two 1-quart oven-safe bowls, like Pyrex (I used one pyrex bowl and one 1 quart pyrex storage container), with softened butter—be really generous with the butter – I had a bit of a time getting my bread out of the container. Using two forks, deflate the dough by releasing it from the sides of the bowl and pulling it toward the center. Rotate the bowl quarter turns as you deflate, turning the mass into a rough ball.
Using your two forks and working from the center out, separate the dough into two equal pieces. Use the forks to lift each half of the dough into a prepared bowl. If the dough is too wet to transfer with forks, lightly grease your hands with butter or oil, then transfer half to a bowl. (If your dough drops and breaks apart on the transfer, don’t worry, just divvy the dough between the bowls and it will come back together as it rises.) Do not cover the bowls. Let the dough rise on the countertop near the oven (or another warm, draft-free spot) for 10 to 20 minutes, until the top of the dough just crowns the rims of the bowls.
Transfer the bowls to the oven and bake for 15 minutes. Reduce the heat to 375° F and bake for 17 to 20 minutes more, until evenly golden all around. Remove the bowls from the oven and turn the loaves out onto cooling racks. If the loaves look pale, return them to their bowls and bake for 5 minutes longer. Let the loaves cool for 15 minutes before cutting.
Note: If you don’t have 2 one-quart bowls, you may use other vessels, though differences in pan sizes will affect the shape of the final loaves. This recipe can be adapted for 2 loaf pans (preferably 8.5 x 4.5-inch pans) by multiplying the quantities of ingredients by 1.5 (i.e. 6 cups/768g flour, 3 cups water, etc.).
_____
• Parker House Rolls •
via The Food Network (Bobby Flay)
Start to finish, about 3 hours
Image top right. These are rich and flavorful buns. They work well as hamburger rolls in a pinch or eat on their own. They keep for a couple of days, just pop into the oven to refresh before eating.
Ingredients
1 1/2 cups milk
1 stick unsalted butter, cut into pieces, plus more for brushing
1/2 cup sugar
1 package active dry yeast
1/2 cup warm water
3 large eggs, lightly beaten
1 1/2 teaspoons salt
6 cups all-purpose flour
Place milk in a small saucepan and bring to a simmer. Remove from the heat, stir in the butter and sugar and let cool. Dissolve yeast in warm water and let sit until foamy. Combine milk mixture, eggs, yeast, salt, and 1/2 of the flour in a mixer with the dough attachment and mix until smooth. Add the remaining flour, 1/2 cup at a time, and stir until a smooth ball forms.
Remove from the bowl and knead by hand on a floured surface for about 5 minutes. Place in greased bowl, cover, and let rise in a warm place until doubled in bulk, about 60 to 70 minutes. On a floured surface, punch down the dough and shape into desired shapes. If you want the classic small roll make your pieces about the size of a golf ball – they grow quite a bit. For hamburger-sized rolls make a bit bigger. Place on a parchment paper-lined baking sheet. Cover again and let rise until doubled, about 30 to 40 minutes.
Preheat the oven 350 degrees F.
Bake for about 20 minutes or until golden brown. Remove from the oven and brush with melted butter before serving.
_____
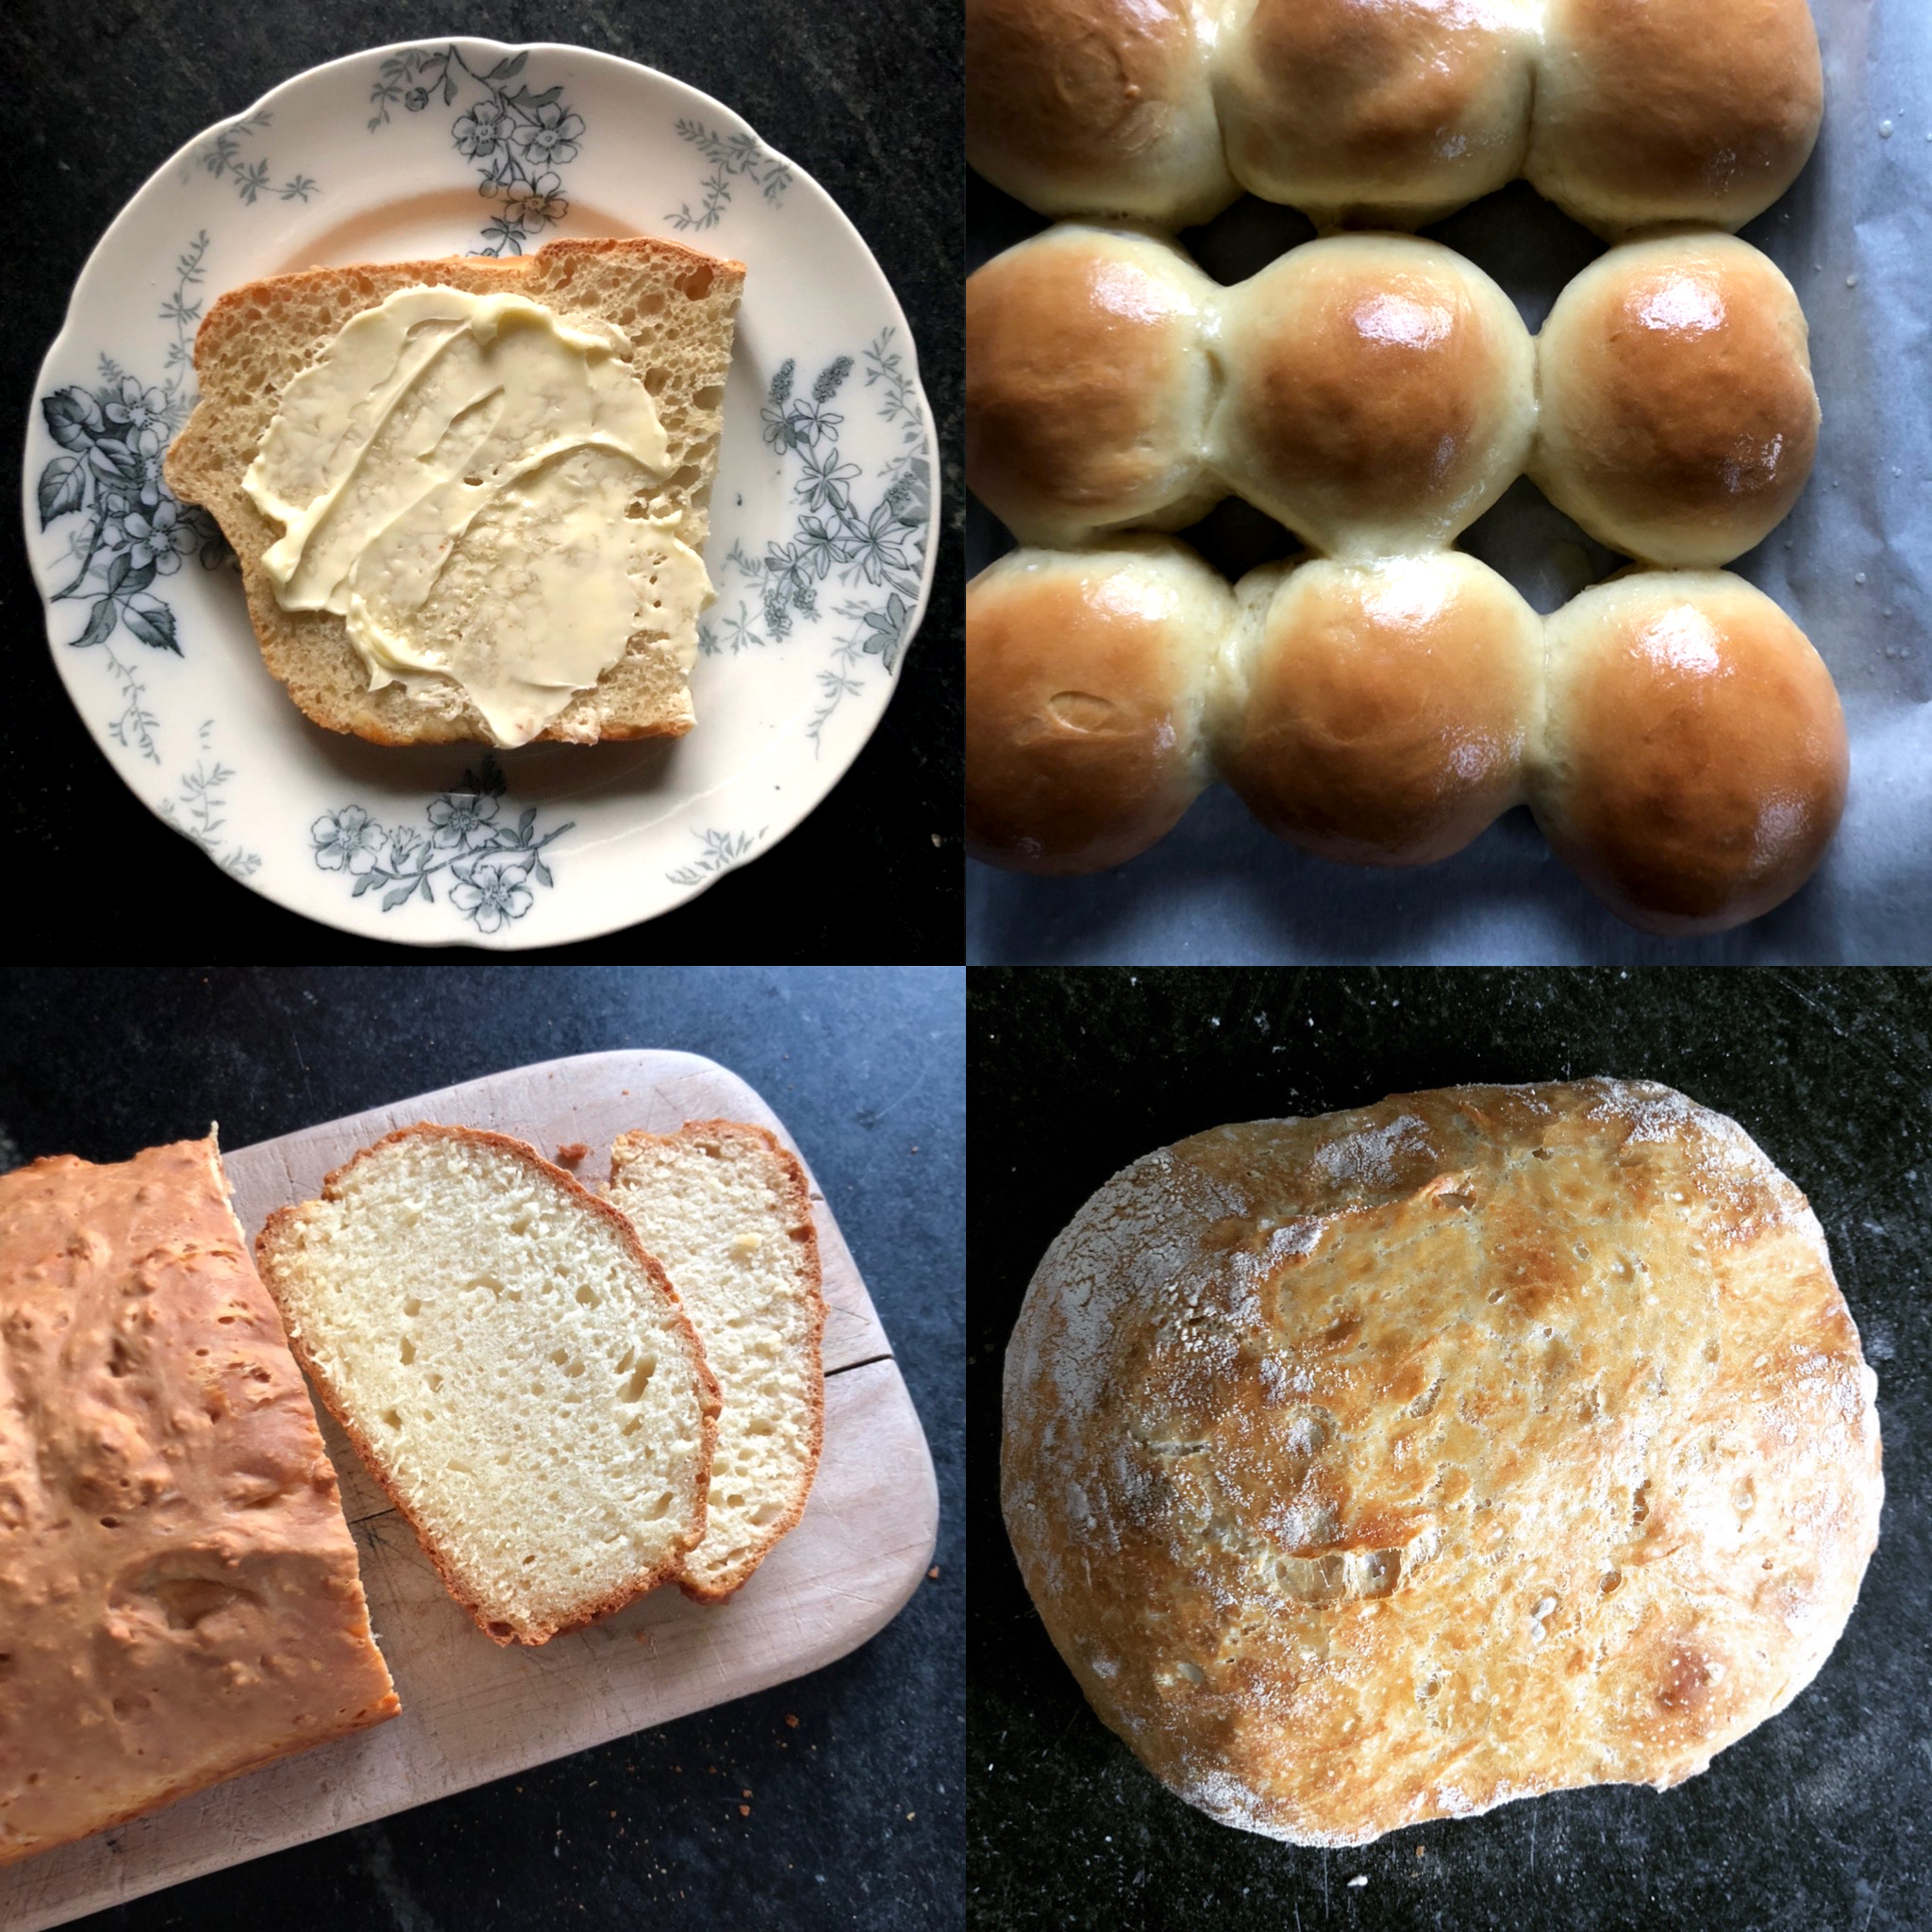
• No-Knead Bread •
From Epicurious (Jim Lahey)
Start to finish, upwards of 22 hours
Image bottom right. This is without a doubt the best bread I’ve ever made. Let it rise for the full 18 hours for a really good chewy texture and good crust.
Ingredients
3 cups (400 grams) bread flour
1 1/4 teaspoons (8 grams) table salt
1/4 teaspoon (1 gram) instant or other active dry yeast
1 1/3 cups (300 grams) cool water (55 to 65 degrees F)
Wheat bran, cornmeal, or additional flour, for dusting
In a medium bowl, stir together the flour, salt, and yeast. Add the water and, using a wooden spoon or your hand, mix until you have a wet, sticky dough, about 30 seconds. Make sure it’s really sticky to the touch; if it’s not, mix in another tablespoon or two of water. Cover the bowl with a plate, tea towel, or plastic wrap and let sit at room temperature (about 72 degrees F), out of direct sunlight, until the surface is dotted with bubbles and the dough is more than doubled in size. This will take a minimum of 12 hours and up to 18 hours (go for the 18 – you won’t regret it). This slow rise—fermentation—is the key to flavor.
When the first fermentation is complete, generously dust a work surface (a wooden or plastic cutting board is fine) with flour. Use a bowl scraper or rubber spatula to scrape the dough onto the board in one piece. When you begin to pull the dough away from the bowl, it will cling in long, thin strands (this is the developed gluten), and it will be quite loose and sticky—do not add more flour. Use lightly floured hands or a bowl scraper or spatula to lift the edges of the dough in toward the center. Nudge and tuck in the edges of the dough to make it round.
Place a cotton or linen tea towel (not terry cloth, which tends to stick and may leave lint in the dough) or a large cloth napkin on your work surface and generously dust the cloth with wheat bran, cornmeal, or flour. Use your hands or a bowl scraper or wooden spatula to gently lift the dough onto the towel, so it is seam side down. If the dough is tacky, dust the top lightly with wheat bran, cornmeal, or flour. Fold the ends of the towel loosely over the dough to cover it and place it in a warm, draft-free spot to rise for 1 to 2 hours. The dough is ready when it is almost doubled. If you gently poke it with your finger, making an indentation about 1/4 inch deep, it should hold the impression. If it doesn’t, let it rise for another 15 minutes.
Half an hour before the end of the second rise, preheat the oven to 475 degrees F, with a rack in the lower third position, and place a covered 4 1/2–5 1/2 quart heavy pot in the center of the rack. I use an enameled cast iron pot.
Using pot holders, carefully remove the preheated pot from the oven and uncover it. Unfold the tea towel, lightly dust the dough with flour or bran, lift up the dough, either on the towel or in your hand, and quickly but gently invert it into the pot, seam side up. (Use caution—the pot will be very hot.) Cover the pot and bake for 30 minutes.
Remove the lid and continue baking until the bread is a deep chestnut color but not burnt, 15 to 30 minutes more. Use a heatproof spatula or pot holders to carefully lift the bread out of the pot and place it on a rack to cool thoroughly. Don’t slice or tear into it until it has cooled, which usually takes at least an hour.
